und Audio...


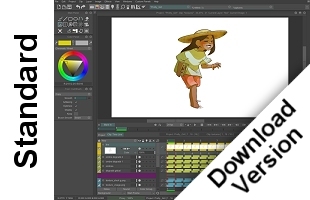
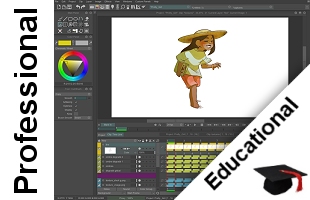
 Stop Motion ProCTP ProTVPaint AnimationLip Sync Pro
Show Control
Venue MagicAudio
Lynx Studio TechnologyAcousticaDrumagogSupersonicUSB ASIO Treiber
The Advanced Art of
Stop-Motion Animation
von Kenneth Priebe
*Amazon Partnerprogramm

Diese Tutorials (in englischer Sprache) richten sich an TVPaint Animation Neulinge, die zum ersten Mal mit TVPaint arbeiten.
 Your first Drawing with TVPaint Animation
Your first Animation with TVPaint Animation
How to use the drawing tools of a conventional animator
How to colorize a character
Your first Drawing with TVPaint Animation
Your first Animation with TVPaint Animation
How to use the drawing tools of a conventional animator
How to colorize a character
This tutorial is intended to teach some techniques in order to colorize a character made with TVPaint Animation. This first approach of the colorization consists in using the filling tools. Several tips will be provided as the tutorial goes along to perfect your colors.
You can download the project file corresponding to this tutorial here.
Our project contains a layer named Lineart. This layer includes the outlines of our character.


We are going to start with creating the Image layers which will contain all the colored areas.
A tip is to create one layer per element that is intended to be colorized (T-shirt, trousers, shoes, skin, etc...). For more convenience, I've gathered several elements which will have the same color on one layer (the shoes, the jacket, the belt and the glove are on the same layer) which is easy to do since those elements are not too close from each other.
You can lock the layer containing the outlines to avoid to modify it. You just have to click on the little lock button which is near the corresponding layer from the Timeline.
I chose to work on a grey background with checks in order to give the colors a better visibility.
You should obtain a Timeline similar to this one:

We are now going to do the colorization. Select the Skin layer as the current layer.
If you use the Floodfill tool with the default options, you will fill the whole screen.
To fill only the clothes, you have to define which are the reference layer(s) you will use for the outlines. We will choose the layers that are above of the current layer by selecting the Front option.


The result and the colored areas look similar to what we expected at this step. Here follows the result for the Skin layer:

Sometimes you will see some mistakes caused by the aliasing of the outline. Working with grey-scaled checked background does not help to visualize them better either. Here is a convincing example... Colorize the trousers then change the background for a lighter one. You will see the following mistakes:


To fix them, you must use the Range setting available in the Floodfill tool options panel. Increasing the value of the Range setting allow to fill the pixels which are only semi-transparent. The tolerance threshold of the outlines is bigger.
If we take the previous example and that we change the Range value up to 80, you will obtain the following result (It looks better but not perfect yet.):


The Expand floodfill setting allow to enlarge the colorizations limits up the number of pixels that you will define. By increasing it up to 1, we get the following result :

Let's try to fill the leg that is behind now.
The problem due to the aliasing is solved and the layers which are above the current one are correctly used as the outline reference. We didn't filled the desired area though. This is because there are gaps in the outlines.


You can try to find them all to fill them but it can take a long time and being very tedious!
Fortunately, TVPaint Animation does the trick for you thanks to the GapCloser setting which will allow us not to take care of this gaps and to save substantial time!
When you set this parameter to 1, the 1-pixel wide gaps will be automatically detected and they won't be filled:


Then you'll obtain the following result:


However, be sure that the GapCloser option is enabled only when it's required.
To give you an example, set the GapCloser to 1 and let's fill the trousers. That's defintely not what we are looking for! So you have to be careful and to disable this option (set it to 0) when it's not necessary.
If you used efficiently what we talked about previously, you will get something looking like this (You can get the corresponding tvp project here):

Let's go on with the mask (that we call Stencil in TVPaint Animation). Using the masks will simplify the task. This option is very useful since it allows us not to put the colors out. Let's do for example some shadows on the trousers. To enable the Stencil, you just have to click on the box which is on the left of the layer name in the Timeline (see picture below). The box get highlighted when the Stencil is enabled. We can now do the shadows without risking to put colors anywhere!


With and Without a mask
Don't forget to disable the option when you will do the same for the other parts of the character and to enable it again on the correct layer.
Another solution would be to use the Preserve transparency option. You just have to click on its icon which is the main tool bar. Once it's enabled, you cannot apply colors on transparent pixels anymore. The result will be the same as i we used the Stencils.
Note that you can do the same for the outlines since some artists would prefer to have colored outlines and not black ones. For this drawing, I decided to keep the outlines black.
Here is what i finally got when working on the shadows:

And here is the final drawing:


The Advanced Art of
Stop-Motion Animation
von Kenneth Priebe
*Amazon Partnerprogramm
Acoustica
CTP Pro
Drumagog
Lip Sync Pro
Lynx Studio Technology
TVPaint Animation
Stop Motion Pro
USB ASIO Treiber
Venue Magic
NEWS
Neuste Meldungen
Messen & Events
Pressespiegel
Unser Online Shop
Schnäppchenecke
Allgemeine Geschäftsbedingungen
Widerrufsbelehrung
Versandkosten und Lieferzeiten
Bezahlmöglichkeiten
Verbraucherschlichtung
KONTAKT
Kontaktadresse
Kontaktformular
Impressum
Datenschutzinformationen
Unser Profil
Unsere Partner
DBS GmbH
Oberhöchstadter Str. 10
D-61440 Oberursel
Tel. 06171-582010
Fax 06171-582012
Folgen Sie uns
Neuigkeiten rund um unsere Produkte