und Audio...


 Stop Motion ProCTP ProTVPaint AnimationLip Sync Pro
Show Control
Venue MagicAudio
Lynx Studio TechnologyAcousticaDrumagogSupersonicUSB ASIO Treiber
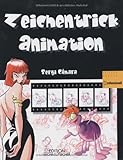
Zeichentrick Animation
von Sergi Càmara
*Amazon Partnerprogramm

Diese Tutorials (in englischer Sprache) richten sich an TVPaint Animation Neulinge, die zum ersten Mal mit TVPaint arbeiten.
 Your first Drawing with TVPaint Animation
Your first Animation with TVPaint Animation
How to use the drawing tools of a conventional animator
How to colorize a character
Your first Drawing with TVPaint Animation
Your first Animation with TVPaint Animation
How to use the drawing tools of a conventional animator
How to colorize a character
The aim of this second tutorial is to have a first approach on how to animate with TVPaint animation.
We are going to learn how to :
- add, delete or duplicate images.
- play an animation and set its framerate.
- create and set some layers.
Let's begin by double clicking on the software's icon and by reseting the configuration. Although a lot of video formats are available in the pulldown menu hereafter.
We are going to use a classical VGA display in 640 by 480 pixels and 30 frames per seconds.

In the first tutorial, we saw that as soon the graphic user is download, it is possible to paint directly in the drawing window. So let's begin by drawing the number one '1'.
Take a look now to the timeline : your painting, the number '1' is drawn on the thumbnail. This picture is the first picture of your animation.


If you are reading those tutorials, you certainly know that an animation is a quick succession of motionless images. Reaching the framerate of 24 images per second is enough to give to the human eyes the illusion of a movement.
But back to easy things : we are going to add an image to our animation.
If you want to do so, you only have to click on the second button in the section image of the animator panel.


A second empty image comes instantly on the right of the first one. The painting window is now empty again (here above).
So we can paint the number '2' inside.


Going from an image to another one in the timeline could be done very easily by using the arrows keys of your keyboard. You can also click on the picture where you want to work in order to access to it or you can use the animator panel buttons.


Please note that the current picture is surrounded by two vertical red lines and is also displayed on the left thumbnail of the timeline.

Adding images one by one in your animation could become rapidily tedious. It is also possible to add the number of images of your choice in one operation. To do so, just click with the right mouse boutton on the last image of the timeline and select the option insert images. Then just add 9 images to our animation.

Now add a colored number in each image of the animation, as indicated below:

Here again, you can navigate through the images of your animation by using arrow keys or arrows buttons of the animation panel. The result appears instantly on the screen:

The purpose of our small animation is to display numbers until the number eight '8', after we will write the name 'TVPaint' near this number. Well, the three last images are not really needed.
You can delete them by using one of those two methods:
You can go to the last image of the animation and use the delete button of the animator panel three times.


Or you can select the last three picture of the animation (use the left mouse button) and select 'delete' in the contextual menu (use the right mouse button).

Be carreful not to confuse the action of deleting the contents of an image Beginner Tutorial #1 and the action of deleting the image itself inside an animation.
We are going to duplicate the last image of the animation (the one with the number '8' inside). You have two possibilities to do so:
You can use the arrow key to go on the image you want to duplicate and use the duplicate encircled button of the animator panel.


You can use the contextual menu of the image that you need to be duplicated too.


It is now time to modify the images we have just created by adding the name of our favorite software.


You should obtain the following timeline:

We just saw that it was possible to navigate through the image of the animation by using the arrow keys of your keyboard. Of course, you can play the whole animation from the beginning to the end. In order to play the animation, you only have to use one of the buttons at your disposal in the drawing window or in the animator panel. If you click on those buttons a second time, it will stop the animation.


If you need to have a loop play mode, just activate the button encircled before playing the animation:

Ok, you pushed the play button and it is moving ... but your are not totality satisfied ? The animation is too fast!! Well ... it's easy to understand: In fact the number of images displayed during one second is 30 for the VGA mode . If this framerate is often used by professionals, or in the videogame industry, it is not adapted to our unpretentious animation. We can solve this small problem by using one of those two methods:
You can modify the framerate by clicking on the appropriate button of the drawing window : a list of predefined framerate will appear.


You can also duplicate each image of your animation several time. To do so, begin by selecting all the images of your animation : use the select all button in the layer section of the animator panel:


Now use one of the two methods described in the seventh paragraph. You should get this timeline:

And here is the animation:

We have just put in succession some pictures in the timeline and therefore, we created an animation
This series of images is called animation layer
In TVPaint animation, we use to distinguish two kind of layer:
- the image layers whose images stay the same all the time
- the animated layers whose images are changing through the time.
As in the most common painting or photo retouching softwares, it is possible to spatially superimpose several layers in order to work.
In the case of a real cartoon, we could have for example:
- A first layer with the background landscape (image layer),
- A second layer with the characters overlay (animation layer),
- A third layer with the colors assigned to the characters (animation layer too).
But let's come back to our animation...
In order to illustrate the last chapter, we will add a background picture behind the animated layer of the animation.
To do so:
- Come back to the first image of our animation,
- Select the new layer image option in the pulldown menu called new of the timeline.

- Select a grey color as A color in your color picker,
- Select the penbrush tool and set its size to 30 pixels,
- and finally draw a big grey blob on the image with your stylus.


You should obtain the following timeline:

At this state, the image on which you are drawing is on the light grey layer and surrounded by two red vertical lines. You can also use the buttons hereafter of the animator panel in order to change the layer where you want to work.


You can see that the stroke is located over the number '1' (the software is stylus pressure sensitive so it is normal that the number is not completely covered
If you use the play option and watch the animation, you should see that only the first number is covered by the grey blob, not the others.
We still not have reached our objective, but stay here, we are not so far...

It is possible to make our image layer moving behind the animated layer with the numbers.
You certainly guess it, we are going to use the animator panel.


Now, the number is in front of the grey blob

Now there is only to duplicate the grey blob 10 times (see part 7th) in order to have a grey blob behind every number of our animated layer.
You can notice that no icon is displayed on an image layer. There is only a thumbnail on the left of the timeline encircled hereafter:

Ok, now your first animation is finished: enjoy it!


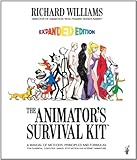
The Animator's Survival Kit
von Richard Williams
*Amazon Partnerprogramm
Acoustica
CTP Pro
Drumagog
Lip Sync Pro
Lynx Studio Technology
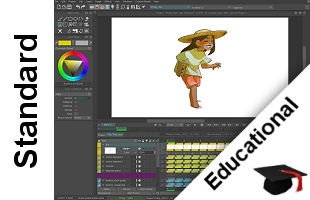
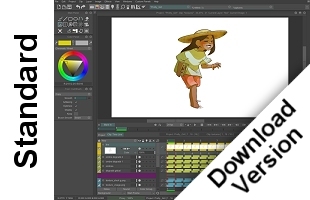
TVPaint Animation
Stop Motion Pro
USB ASIO Treiber
Venue Magic
NEWS
Neuste Meldungen
Messen & Events
Pressespiegel
Unser Online Shop
Schnäppchenecke
Allgemeine Geschäftsbedingungen
Widerrufsbelehrung
Versandkosten und Lieferzeiten
Bezahlmöglichkeiten
Verbraucherschlichtung
KONTAKT
Kontaktadresse
Kontaktformular
Impressum
Datenschutzinformationen
Unser Profil
Unsere Partner
DBS GmbH
Oberhöchstadter Str. 10
D-61440 Oberursel
Tel. 06171-582010
Fax 06171-582012
Folgen Sie uns
Neuigkeiten rund um unsere Produkte